I completed the Martha Pullen online teaching license and received my certificate today! You may notice on the home page there is now a Martha Pullen logo. Hooray!!!
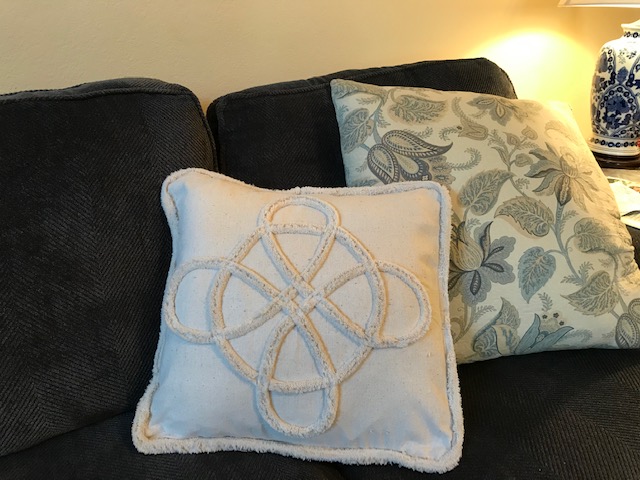
In an earlier post, I stated I had two more projects to go until the class was completed. I wanted to share them with you and let you know what I did right and wrong. Believe me when I say if I can do it, you can too. If you want to embark on these projects, let me know and I’ll try to help. The second to last project was this pillow with a Celtic design. The pillow form is inserted and there are buttons and button loops on the back. The pillow cover is made of muslin and the decoration is chenille, which is made using osnaburg fabric. There is a template for the design, but it is tricky. First, the fabric is a tan color, so harder to see through the fabric to the template for tracing. I managed to do this well, but when I make more, I’ll use tracing paper between the fabric and template to make it more precise. Another issue is the direction of the decoration. You might not be able to notice, but there is an over-and-under pattern to it, so it can sometimes be difficult to manage with the thick osnaburg bias strips. Last, I didn’t quite understand the instructions on the outer trim and did it my way. I enjoyed learning how to make the corners better (not too pointy and not too rounded). This is a project that I hope to repeat many times. It is so enjoyable to make the chenille, and because they are bias strips, they are so easy to shape.
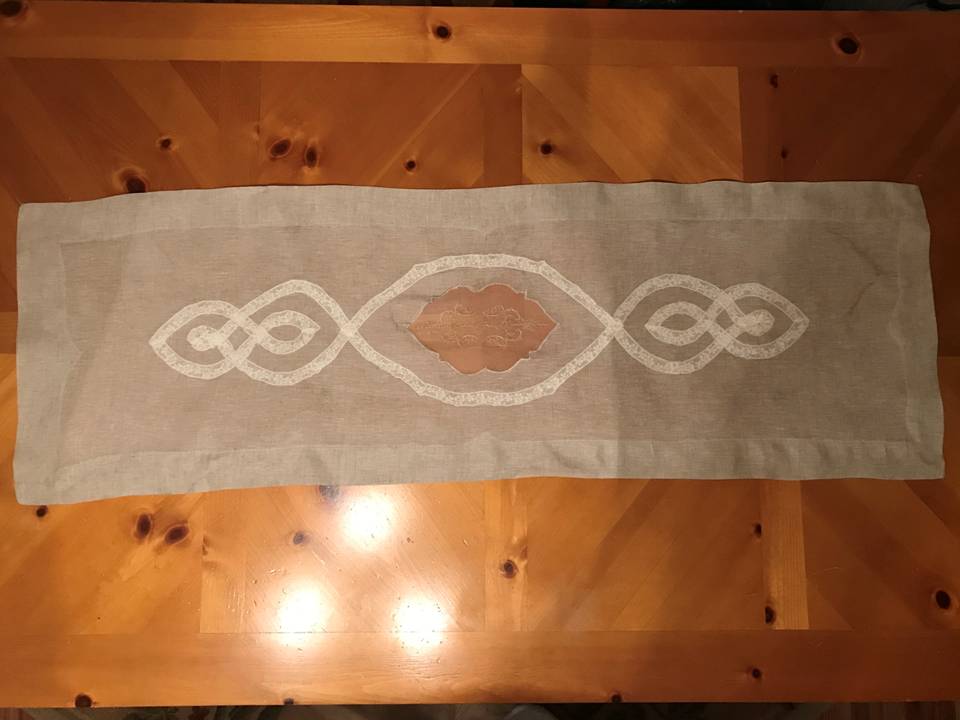
The last project, a table runner, was much more challenging. This handkerchief linen had to be starched several times before it was stiff enough to work with. Again, I should have used tracing paper to transfer the design on the linen, but I chose to put the pattern underneath and trace as best I could. I’ll know better next time. The first steps include using organza as the base for embroidery. Then it is placed on the linen and satin stitched in the traced design. After removing the linen from behind the organza, it has a nice windowpane effect. Unfortunately, I nicked a spot (pretty sure you can’t tell) and there’s a tiny hole. Trust me, it is very easy to do. I also used a washable pen for most of the transfer work, but decided one part needed a regular ink pen because it was easier to see and I believed it would be cut out of the final project. You can still see the ink on that one spot, but I am sure with a few washings, it will come out.
Then comes the lace shaping. Despite having watched the video multiple times, I had hoped the lace shaping would have come out a bit better. One part of the lace shaping got a bit wobbly. I still think it’s an awesome first attempt, and I’m proud of what I learned. The last part was what I thought would be the easiest, but of course, it was more difficult than I thought. There is a special way you fold the corners under, then sew and cut off the excess. After that, you use a wing needle and choose a stitch you like to finish it. I enjoyed this part, and working with the wing needle is very cool! I will definitely use both the fold-under corners and wing needle again on future projects.
If you are on the fence about taking a Martha Pullen class, please contact me. It was on the expensive side, but I learned many new techniques. Additionally, there were several fabrics I had never worked with. Both of these gave me more confidence. Some of the projects in the class were mandatory while others were from a group you could choose from. For example, one project needed to be from the heirloom group. Most of those options were children’s items with lace, ribbon, and specialty techniques. Since I don’t have small children and don’t foresee grandchildren anytime in the near future, I chose the table runner. It had several of the same techniques. There was also a potpourri category, and I chose the Celtic pillow. I just loved the look of it. Overall, I’m very happy I enrolled in (and completed) this course.
Next projects: 1) Currently I’m making things for a neighbor out of her mother’s old quilt squares. Her mother passed away recently, and the three daughters would like something to remember their mother by, so I’m making pillows, a table runner, a small quilt, and more out of their mother’s work. 2) I’ll continue teaching at Burritt on the Mountain. The holiday stocking project went well. The next class (January) will be a round table topper with Valentine fabrics. 3) I’m also going to put one of the patterns I purchased during Black Friday week to good use. My first attempt is going to be a spring top. You’ll have to hold me to this so I don’t chicken out. No matter how much they advertise “Easy” or “Very Easy,” I still find patterns intimidating. Hope you have a great end of the year, and a much better New Year!
Beth
